8 Creating a Group Data Parameter
In this chapter, you create a group data parameter-a data type that encapsulates a set of other data types:
- Start AVS/Express
- Create a point Object
- Create a Distance Module
- Use point and Distance in an Application
A primitive data type is one of AVS/Express' fundamental data types, like float, int, and string. In the last chapter, you created a module whose data parameters were all primitives.
In this chapter, you take a brief break from the Echo Sounding application to learn about another kind of data type, called a composite data type. A composite data type is a data type that encapsulates a set of other data types, similar to a C structure.
In AVS/Express, you create composite data types with a standard object called group. You can use groups as input and output data parameters in modules.
In this chapter, you create a group that represents a point in 2D space, with x and y coordinates. (The Data Visualization Kit supplies a Point object, so you are not really creating anything in this chapter that AVS/Express does not already supply.) You then use the group in a module that calculates the distance between two points. To complete the chapter, you create a simple application that allows you to explore some of the characteristics of a group.
- Visualization Edition users type:
- Developer Edition users type:
Depending on where you saved myproj, you may have to specify a pathname.
AVS/Express begins and loads your project.
n If you are still in AVS/Express from the last chapter, delete the current application workspace and load a new one.
In this section, you create a group object called point, consisting of subobjects x and y. You then create a port for the object, define a distinctive color for the port, and save point as a template object.
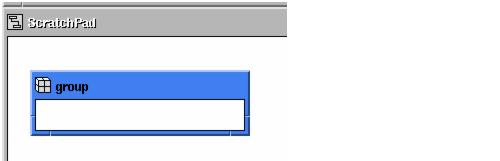
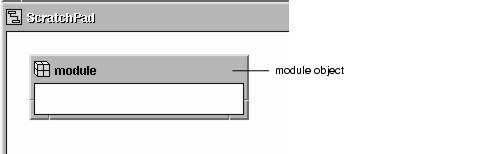
- Select the File->New Application command, select ScratchPad from the New Application dialog, and click OK.
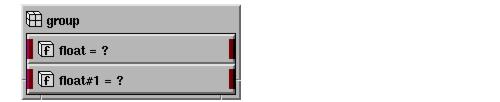
- To instance one object into another, drag the float object from the library into the group object. The group object turns pink when the float object is within it. Release the mouse button to add the float object to group.
- Note: Although you typically instance an object directly into its container object, you can also instance an object somewhere else first, then drag it into its container object. This is called reparenting, because the object changes parents. You might want to try this for one of the float objects. First instance the object into DefaultApplication. Then drag it from DefaultApplication into group.
- You can rename an object in the Network Editor with the Rename popup command. Display the popup menu by positioning the mouse pointer over the object's title bar, then hold down the right mouse button, and select Rename from the popup menu.
Next, you will add an output port to point. (You cannot add an input port right now. You will do that later.)
You will also set point's port color, to red and green, so that the port has a distinctive appearance. Later, you will see how this helps you to identify point objects in the application you build.
- Display the popup menu by positioning the mouse pointer over the object's title bar, then hold down the right mouse button, and select Add Output Port from the popup menu.
- AVS/Express adds the output port, which appears as a gray port on the right side of the object.
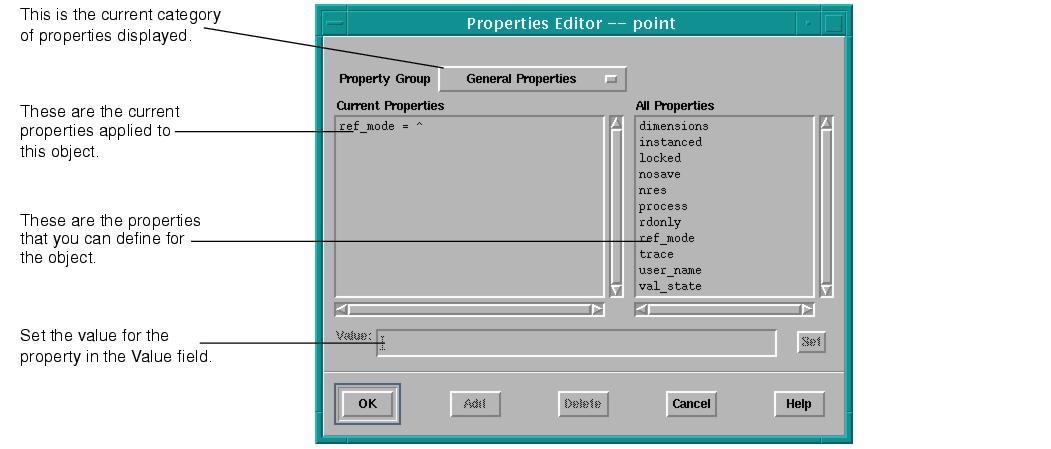
You have seen how to set the most common object properties using the Object Editor. You can set other properties for an object by using the Properties Editor.
- The Properties Editor should be similar to the sample screen shown below:
- You set a characteristic by moving it from All Properties to Current Properties, then setting its value in the Value field at the bottom of the dialog.
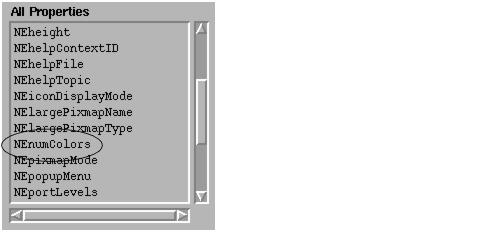
- The All Properties list box now displays the properties related to the object's appearance in the Network Editor. Scroll down All Properties until you see NEnumColors:
- You can add it to Current Properties in two ways. Either double-click on it or select it then select the Add button.
- NEnumColors appears in Current Properties. Its current value, 1, appears in the Value entry field.
- You want the port to consist of two colors, not one.
4. In the Value entry field, change NEnumColors' value from 1 to 2, then select the Set button or press Enter.
- NEnumColors's new value appears in Current Properties.
- Next, you specify the port's two colors.
5. Find NEcolor0 in the All Properties list box, move it to Current Properties, and change its value from 0x303030 to 0xff0000.
- 0xff0000 specifies a color in terms of an RGB hexadecimal value. ff sets the red component to 255; 00 sets the green component to 0; and the last 00 sets the blue component to 0.
- NEcolor0's new value appears in Current Properties.
6. Similarly move NEcolor1 from All Properties to Current Properties and change its value from 0x303030 to 0x00ff00.
- The object now has new port colors. If they do not show up immediately in the Network Editor, open then close point.
You now save point as a template object, so you can use it in modules and applications you build.
- You are reserving Workspace 1 for components belonging to the Echo Sounding application.
- Select the Project->Save pulldown command.
In this section, you create a module called Distance that calculates the distance between two points. The module has two point input parameters (for the two points) and a single float output parameter (for the calculated distance).
One of the significant steps in this section is to indicate that the point input parameters will be getting their values through connections to other objects. You do this by setting an object characteristic called reference mode.
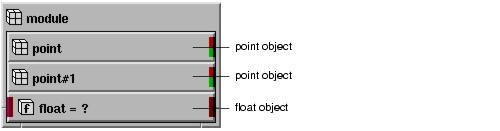
- Go to the Standard Objects library page. Instance the module object from the Modules library into the DefaultApplication workspace.
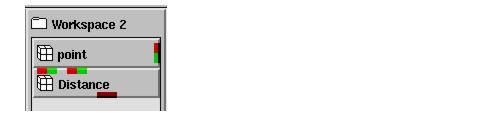
- Go to the Library Workspaces library page. Instance two point objects from Workspace 2 into the module.
- Go to the Standard Objects library page. Instance a float object from the Parameters library into the module.
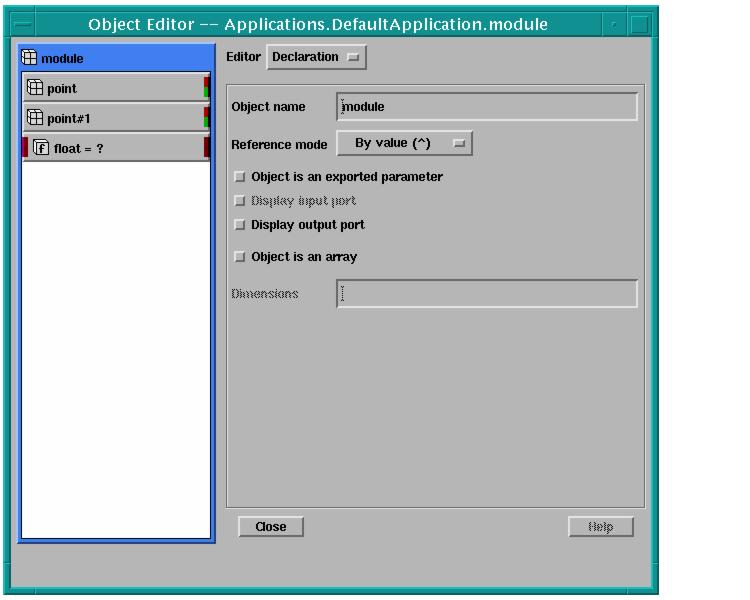
- Select the Object Editor popup command for the module object.
- AVS/Express displays the Object Editor for module:
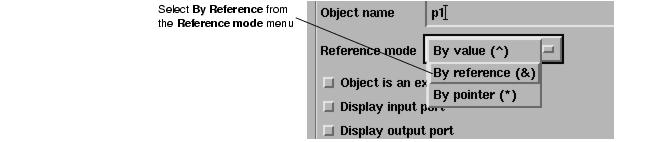
- Notice the & next to p1's name. This indicates that its reference mode is now by-reference.
- A group object can get its value in various ways. The way it gets its value is known as its reference mode.
- The default reference mode is by-value. This means that each subobject of the group must get its own value. You will use by-value mode later, when you use point and Distance in an application.
- For the Distance module, you want input parameters p1 and p2 to get their values through connections to other objects. This is called by-reference mode. You will see the effects of reference mode later, when you use Distance in an application.
- Note also that when p1's reference mode is by-value, the Network Editor prevents you from adding an input port for the object by making the Display input port toggle inactive. By-value mode means that the group's subobjects get their own values. The group does not get its value through a group-level input connection, so the group has no need for an input port.
- But now that you have changed p1's reference mode to by-reference, you can add an input port to expose p1 for graphical connections outside of Distance.
4. Select the point#1 subobject in the Object Editor, specify it as you did p1, only renaming it p2:
- Rename float to dist.
- Set an output port for dist by setting the Object is an exported parameter and Display output port toggles on.
- Connect dist to an expression by entering the following expression in the Connection field exactly as it is written here. Do not write it as it displays on the screen - that will cause an error
- sqrt(pow(p1.x - p2.x,2) + pow(p1.y - p2.y,2))
- In the expression, p1.x refers to the x subobject of p1. Likewise, p2.x refers to the x subobject of p2, and so on.
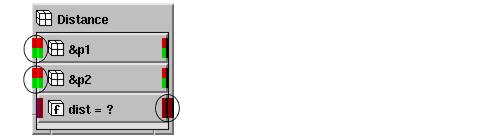
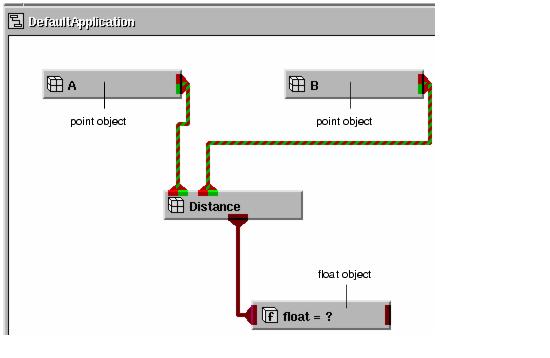
The Distance module in the Network Editor shows the work you have done in the Object Editor:
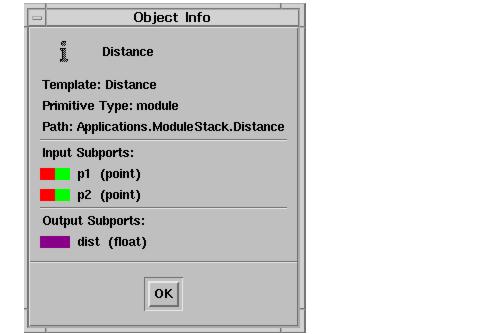
Notice that the distinctive port colors you chose for point objects make it easy to determine that Distance takes two point objects as input. Of course, you can always view the Object Info dialog for Distance.
- The Object Info dialog appears.
- Select Project->Save.
- Deleting ScratchPad reveals your previous application workspace, though it is currently in the closed state within Applications.
5. Maximize the DefaultApplication workspace by double-clicking on it or by selecting the Maximize popup command.
In this section, you create a simple application using point and Distance, then use the application to explore various characteristics of group objects.
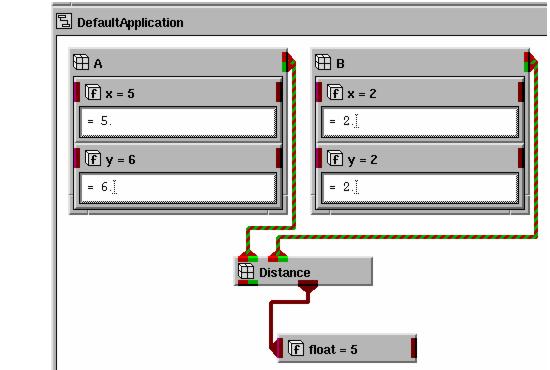
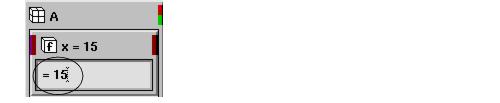
- Objects A and B are point objects, which you instance from Workspace 2 and rename. float is a float object, located on the Standard Objects library page. Do not bother to rename it. Connect the objects as shown below. Position the objects as shown below, as you will be opening A, B, and Distance.
2. Assign values to points A and B, as shown in the diagram below. Don't forget to hit ENTER after typing in each value.
- To assign a value, first open the group object (A or B), then the subobject (x or y). Then type the value in the entry field and press Enter.
- The reference mode for A and B is by-value, the default for a group. This means that the objects do not get their values through a group-level input connection. Instead, each subobject gets its own value. In this case, you have assigned an explicit value to each subobject. (Another way a subobject can get its value is through its own connection to some other object.)
- Once you have assigned values to A and B, AVS/Express determines the distance between the two points. The output appears in the float object.
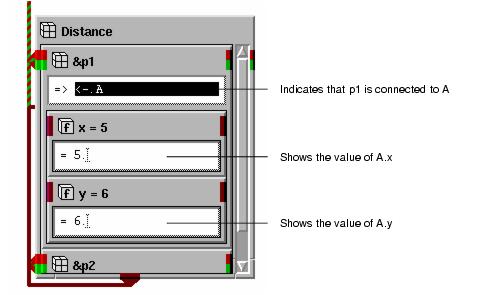
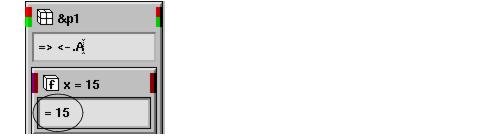
3. Open Distance, then open p1 inside Distance. Increase Distance's height so you can see all of p1.
- By opening Distance and p1, you can see how the connection between point objects A and p1 effectively extends to their subobjects. p1.x has the value of A.x. p1.y has the value of A.y.
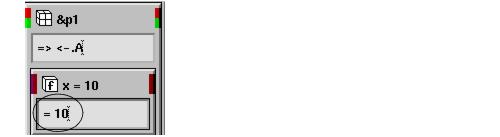
- The connection is effectively bidirectional. For example, if you change A.x, the new value is picked up by p1.x. Conversely, if you change p1.x, AVS/Express updates the value of A.x.
- Remember to press Enter to apply the change.
- Notice that p1.x, inside Distance, reflects the new value of the object to which it is connected.
- Notice, also, that AVS/Express has calculated a new distance, which appears in the float object.
- AVS/Express applies that change to A.x.