


|
|
Creating a view's window (CreateViewUI)
In this tutorial, we create a view's window.
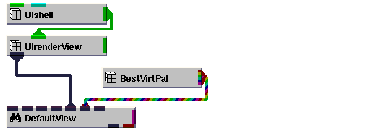
Here is the minimum view window definition. In the diagram, the UIshell is connected to a UIrender View which is connected to the DefaultView, a view's root object.
Instance and connect the UI objects
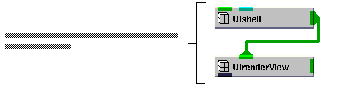
A window for a Graphics Display Kit application consists of, at minimum, a UIshell object and a UIrenderView object. Both are defined in the User Interface Kit.
Instance into the ModuleStack workspace the objects UIshell and UIrenderView, then connect them as shown in the diagram below.
A Graphics Display Kit application requires a view. For this tutorial, we create the view using the application component Mscene3D. Mscene3D defines a 3D view, complete with root object, related base objects, and a top-level object.
Instance Mscene3D, then connect UIrenderView to it, as shown in the diagram below.
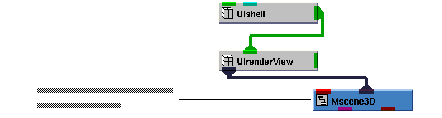
When we connect UIrenderView to Mscene3D, a black window appears inside the window we created. This is where the data is rendered.
Create an object and generate field data
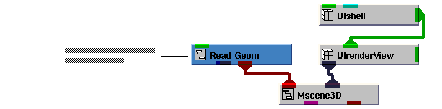
Finally, we need to create a Graphics Display Kit object with field data. We can create both with Read Geom, using the second output port.
Instance Read Geom and connect it to Mscene3D, as shown in the diagram below.
We're now ready to specify a data file. In the ModuleStack window, select the Read Geom pull-down command. Select the Browse button. A dialog box appears. Select teapot.geo, then select the OK button.
The application renders the teapot in the view's window.
This completes the tutorial. The completed tutorial is available in Libraries.Examples.Graphics_Display.CreateViewUI.
|
|