This is an archival copy of the Visualization Group's web page 1998 to 2017. For current information, please vist our group's new web page.
Accelerating Remote X Performance on DaVinci Using NX
|
Overview Installing the NX Client Downloading the NX Client Downloading the Key File from DaVinci Setting Up the NX client Using the NX Client Starting the NX Client Connecting to DaVinci Terminating the NX Client Changing the NX Client Configuration | |||||||||
| Overview | |||||||||
|
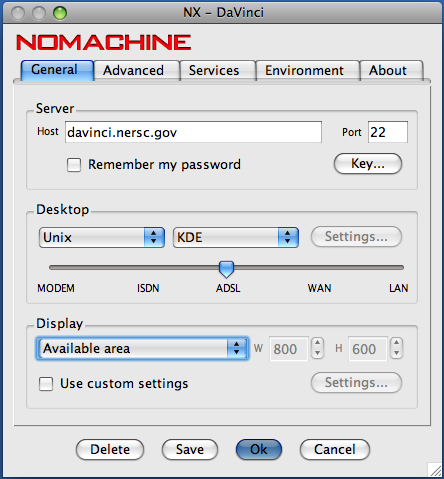
In past NERSC surveys, users complained about poor network performance for interactive, GUI-based applications, or stated that they did not use NERSC resources for interactive GUI-based applications due to poor network performance. In order to address these concerns, we evaluated alternatives to X11 tunneling/compression via ssh in order to alleviate X11 performance problems caused mainly by high network latency to remote locations. The X11 protocol was designed for local area network connections. Because of this fact, several design decisions led to poor performance over wide area network connections. In particular: (i) the X protocol is very verbose, requiring comparatively large amounts of data to be sent over the network, and (ii) many operations require a 'handshake' between client and server leading to long wait times on high-latency links before an operation can be completed. After evaluating several technologies, we chose to implement NX from NoMachine Inc. The base implementation of the server-side code is open source, and clients for several platforms (Linux, Mac OSX, Solaris, and Windows) are available from NoMachine's Web page (http://www.nomachine.org/). At this time, the NX server software has been installed only on DaVinci, which is the primary NERSC system supporting analytics and visualization applications. If you experience any difficulties using NX, please send email to consult@nersc.gov. | |||||||||
| Downloading the NX Client | |||||||||
|
Note: if you are using a Linux platform, an NX client may be included with your Linux distribution. Before using the already installed NX client, check that it is from NoMachine and that it is v. 3.2 or newer. If it does not meet these criteria, then follow the instructions below to download an NX client from the NoMachine Web site.
| |||||||||
| Downloading the Key File from DaVinci | |||||||||
|
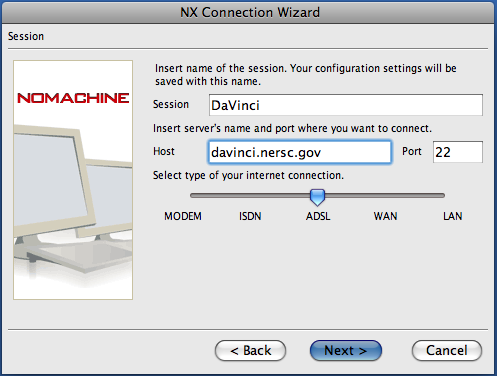
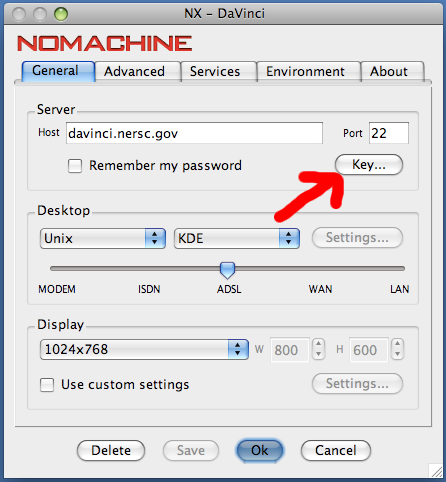
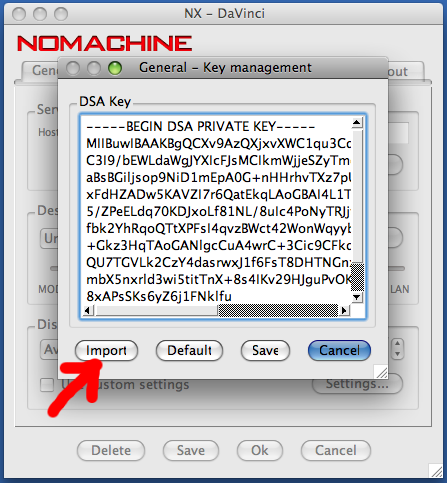
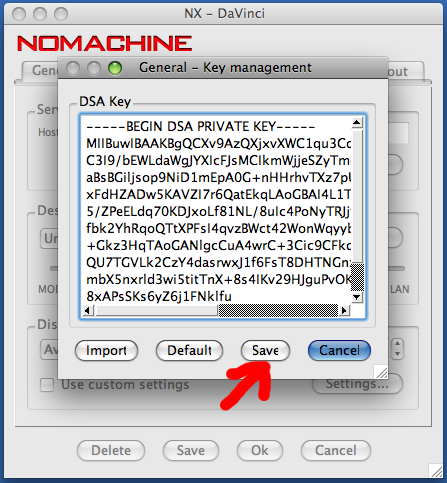
You will need to download a key file from DaVinci to your machine (e.g., to your desktop or home directory). One of the configuration steps below, requires you to import the key file into your local NX configuration. The location of the key file on DaVinci is /usr/common/graphics/NX/DaVinci.key. As noted in the configuration step below, you should delete the key file after the Import and Save steps. | |||||||||
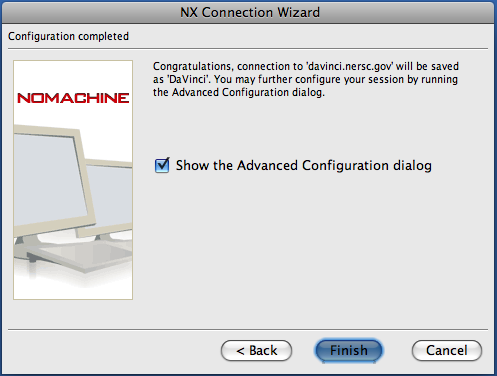
| Setting Up the NX Client | |||||||||
|
| ||||||||
|

| ||||||||
|
| ||||||||
|
| ||||||||
|
| ||||||||
|
| ||||||||
|
| ||||||||
|
| ||||||||
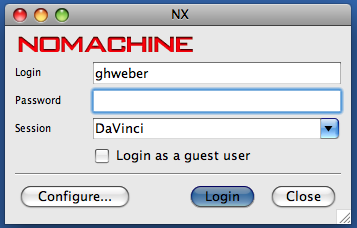
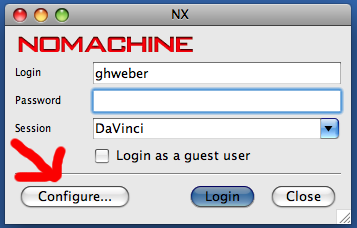
| Starting the NX Client | |||||||||
|
Depending on your platform, you either can launch the NX Client by clicking on the NX icon, or else by typing "nxclient" on the command line (assuming that you have added the path to the executable to the PATH environment variable, e.g., for a Linux installation, add /usr/NX/bin to the PATH environment variable). | |||||||||
| Connecting to DaVinci | |||||||||
|
| ||||||||
|
| ||||||||
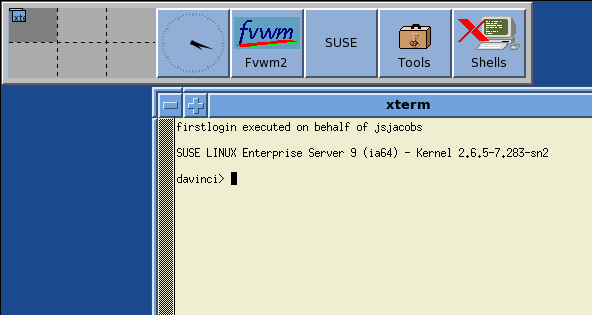
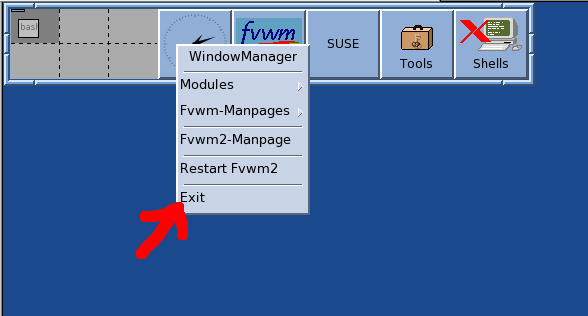
| Terminating the NX Client | |||||||||
|
| ||||||||
| Changing the NX Client Configuration | |||||||||
|
| ||||||||
| |||||||||